Introduction and Purpose of This Guide
This guide is designed for users who are already familiar with the basic concepts of the Britive and Britive Access Broker. It provides step-by-step instructions to help you deploy and configure the Access Broker in a test, staging, pre-prod and production environments.
Britive Access Broker Introduction
Managing and securing access to enterprise applications is becoming more complex every day. While many applications have moved to the cloud and SaaS, a significant number of workloads still run on-premises in data centers, colocation facilities, edge locations, and campus environments. However, these on-prem systems often lack API support and cloud-native capabilities.
Britive Access Broker bridges this gap by extending Just-In-Time cloud privilege access management (PAM) to on-prem servers, databases, internal applications, and any other infrastructure. It delivers cloud operating model, security and efficiency to your entire IT environment.
Benefits of using Britive Access Broker
Traditional Privileged Access Management (PAM) solutions rely on proxies or agents, both of which come with significant drawbacks:
- Proxy-Based Solutions create bottlenecks, add management overhead. Unlike modern approach that promotes distributed architecture, Proxy based products forces control plane and data plan to always cross via proxy.
- Agent-Based Solutions require installation on every system, increasing costs, management overhead, and attack surface. Agents can also conflict with applications, leading to outages.
Following the cloud native principles, Britive Access Broker takes a modern approach. It is neither a proxy nor an agent. It simply “brokers” the privilege access to your on-premise resources. More details about the functionality can be found here.
Getting Started: Use-Case and Topology
In this guide, we will install the Britive Access Broker on a Linux based system and demonstrate its functionality. Our use-case is to send a JIT checkout request from Britive Cloud PAM UI and execute a script saved locally on the Access Broker on-premise server/machine.
Deployment Steps
1- The guide assumes that Britive Cloud PAM tenant is already up and running. Britive Cloud PAM is delivered as SaaS so no installation, deployment and management is required for tenant itself.
2- Configure the Access Broker portion in Britive’s UI
3- Deploy and configure the Britive Access Broker JAR file on remote on-prem server
4- Execute a test script saved locally on Access Broker
Following is the topology we will be using for this guide.
Getting Started: Use-Case and Topology
In this guide, we will install the Britive Access Broker on a Linux based system and demonstrate its functionality. Our use-case is to send a JIT checkout request from Britive Cloud PAM UI and execute a script saved locally on the Access Broker on-premise server/machine.
Deployment Steps
1- The guide assumes that Britive Cloud PAM tenant is already up and running. Britive Cloud PAM is delivered as SaaS so no installation, deployment and management is required for tenant itself.
2- Configure the Access Broker portion in Britive’s \UI
3- Deploy and configure the Britive Access Broker JAR file on remote on-prem server
4- Execute a test script saved locally on Access Broker
Following is the topology we will be using for this guide.
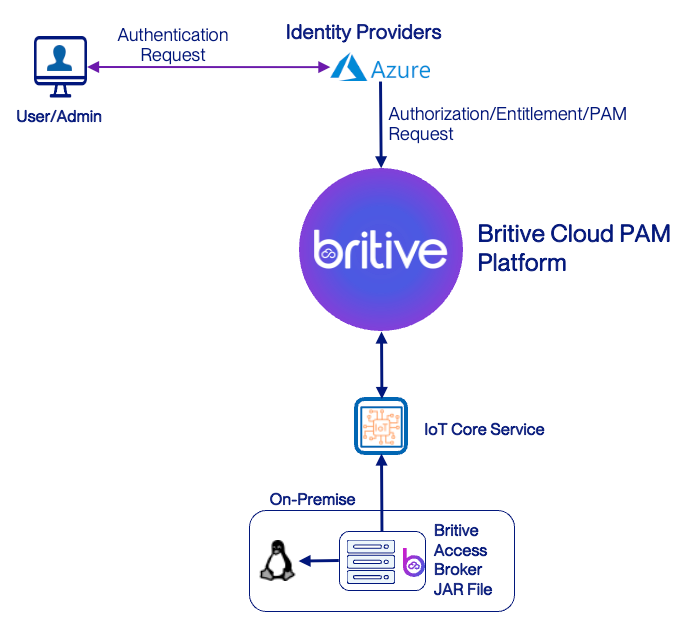
The Access Broker enables JIT access to remote systems like Active Directory and Linux servers. These systems typically do not run the Access Broker itself but are managed through it.
This guide serves as a foundation for understanding the setup and enabling the core functionalities before adding other use-cases
Before we install the Access Broker, we will complete the UI configuration first.
Access Broker UI Configuration Steps for Britive Tenant
Login to your tenant. And follow the steps for Broker deployment in the UI. In my example I am using https://netJoints.britive-app.com
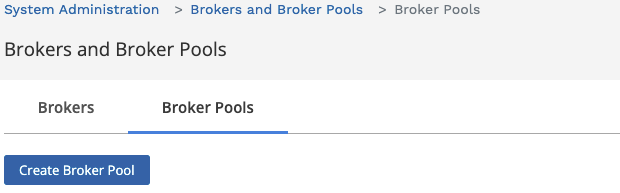
Access Broker Pool Configuration
Even if you are using a single Access Broker, the creation of Broker Pool is a must step. A pool can have one single or multiple access broker in it.


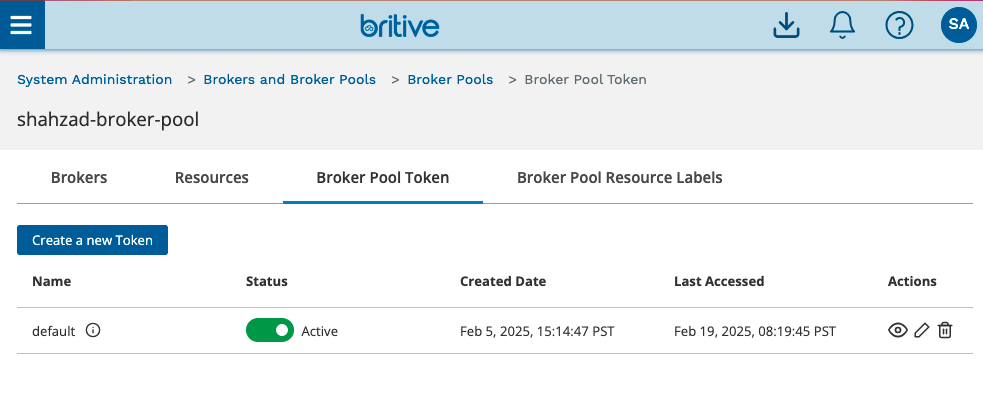
Now click on Actions and get the broker pool token. This is what you will need for the config.yml file to connect broker to broker pool.

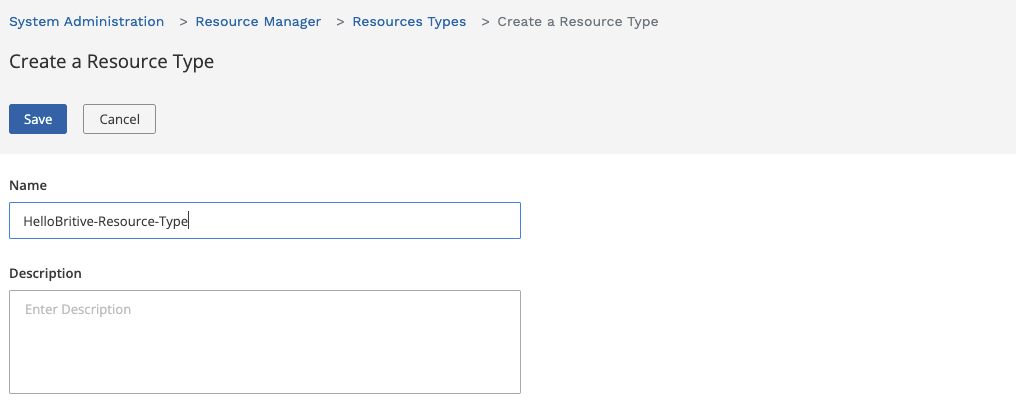
Resource Type Configuration
In the resource manager section create the resource type. The “Resource Manger” UI area to provide JIT access to any resource. The resource type could be anything such as EC2, VM, DC Server, Router, Firewall, SSH system, Active Directory, K8S, etc. Britive is really powerful and extend JIT and ZSP functionality to any on-prem, off-premises, colocation, Edge, or branch location with its common policy model.


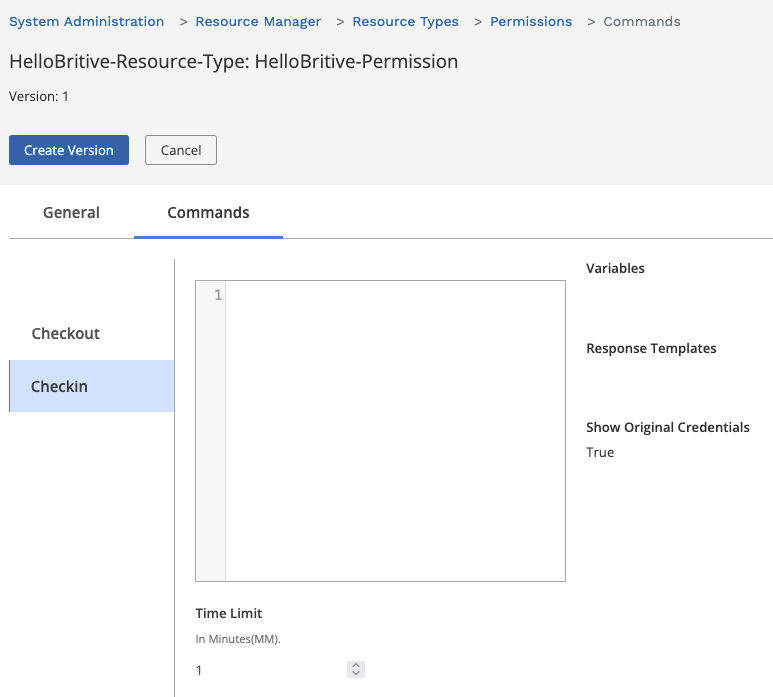
Click Action and then go to Permissions section. Create a permission as shown below
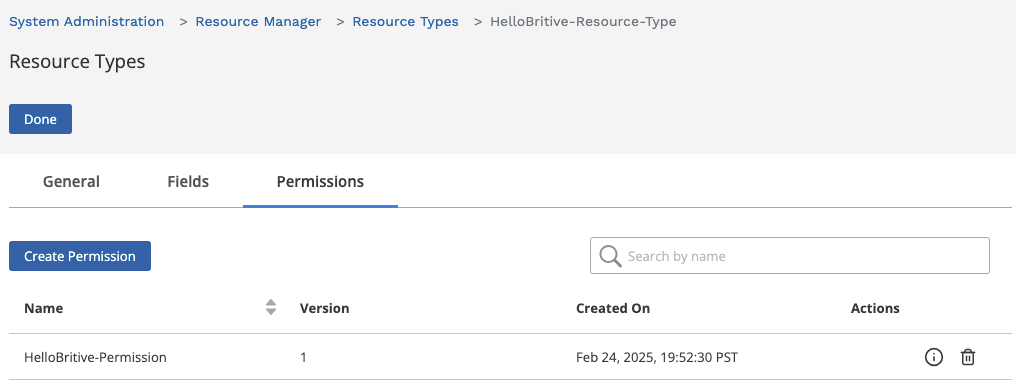
In our example, the script are saved and executed from the Access Broker machine/server, hence the check-in and checkout commands fields are empty.

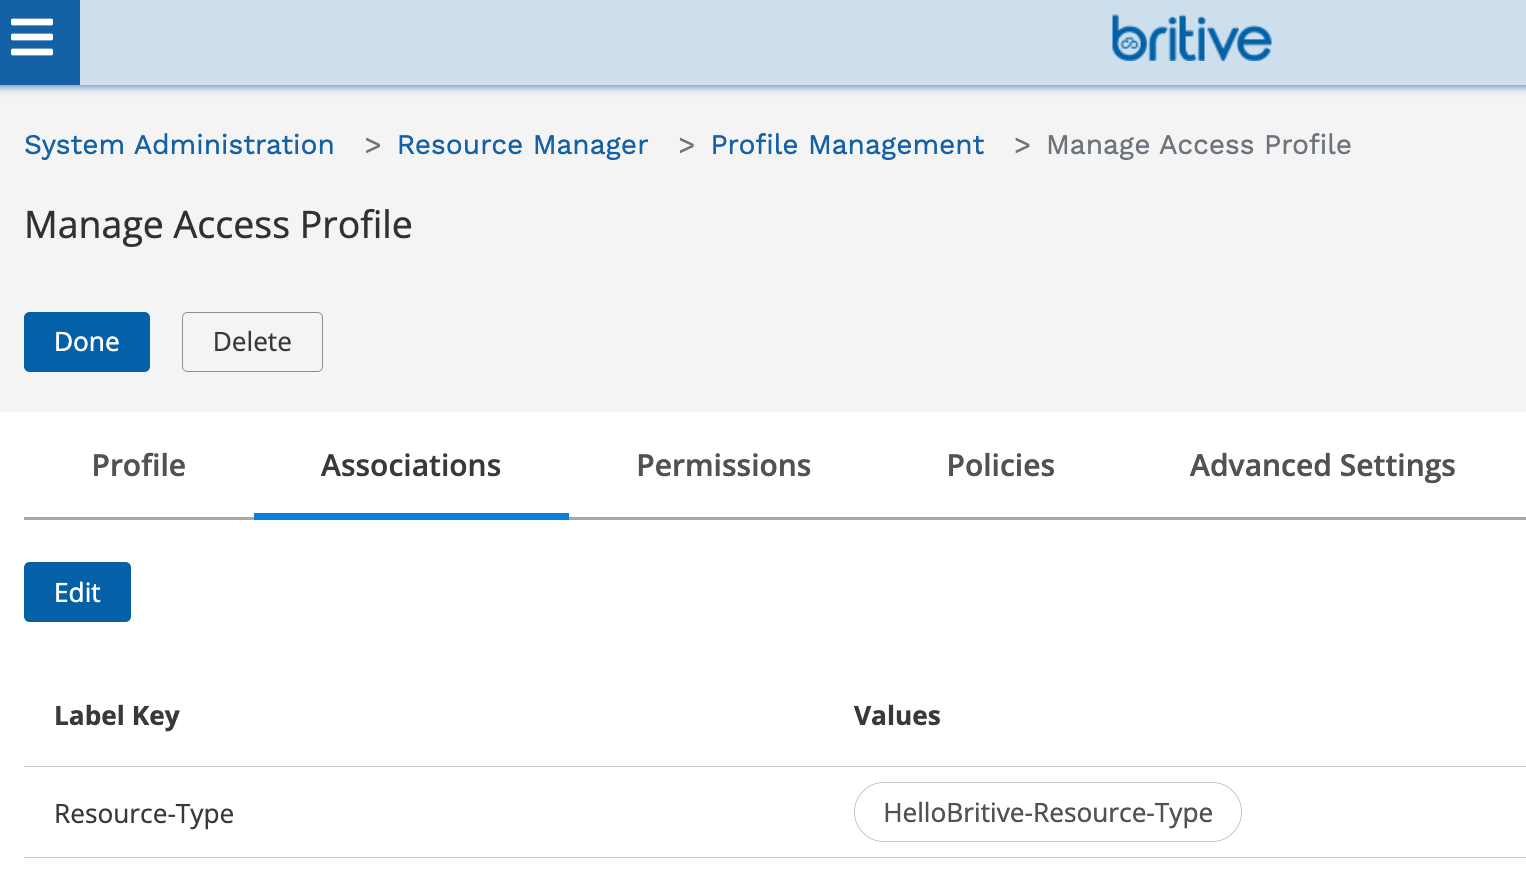
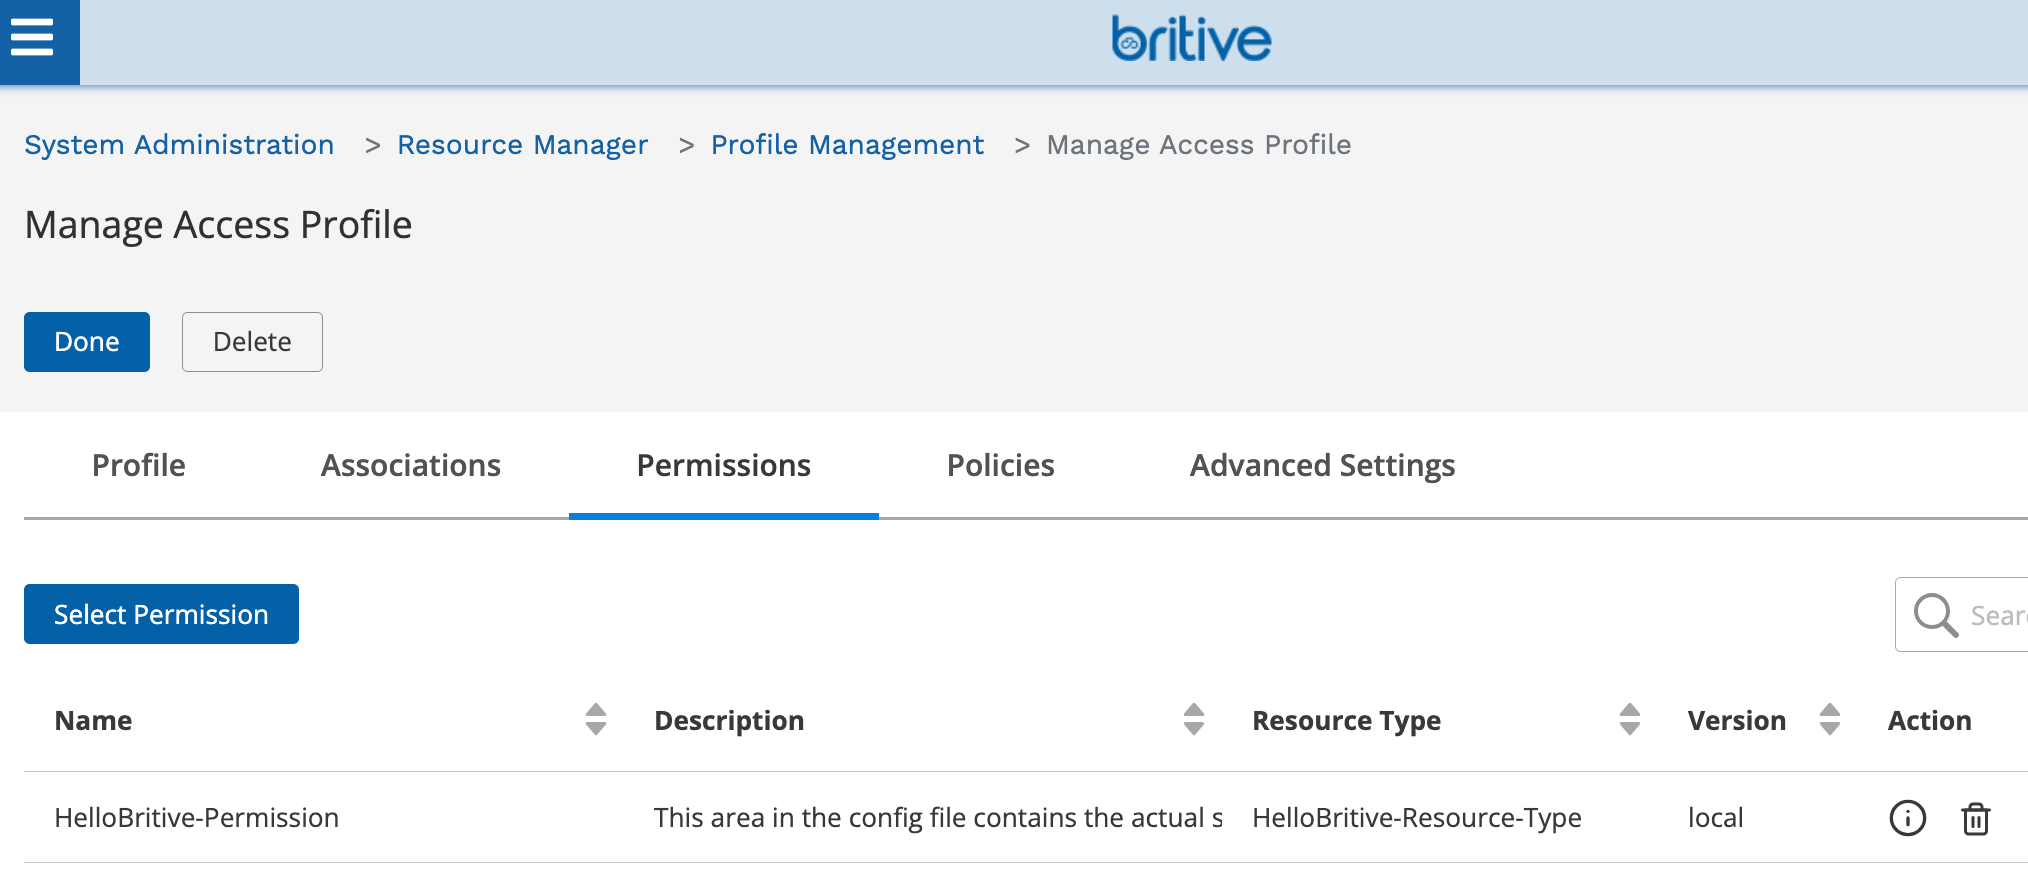
Profile Creation
Now create the Profile and assign it to the user who would have access to checkout this profile.
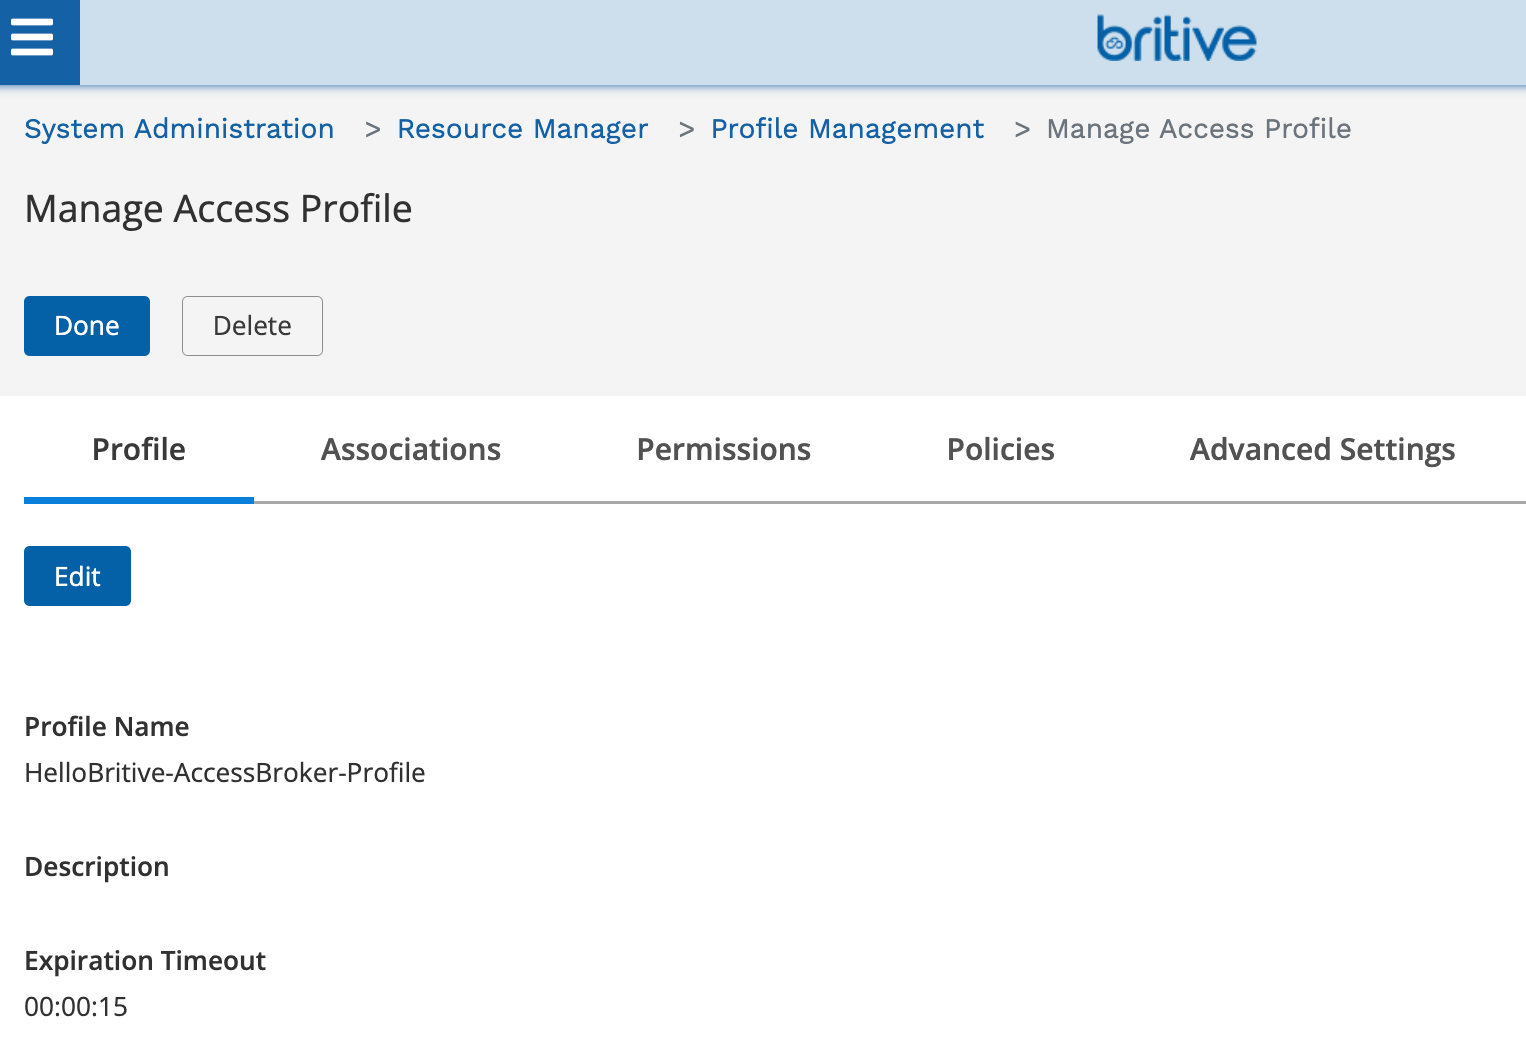
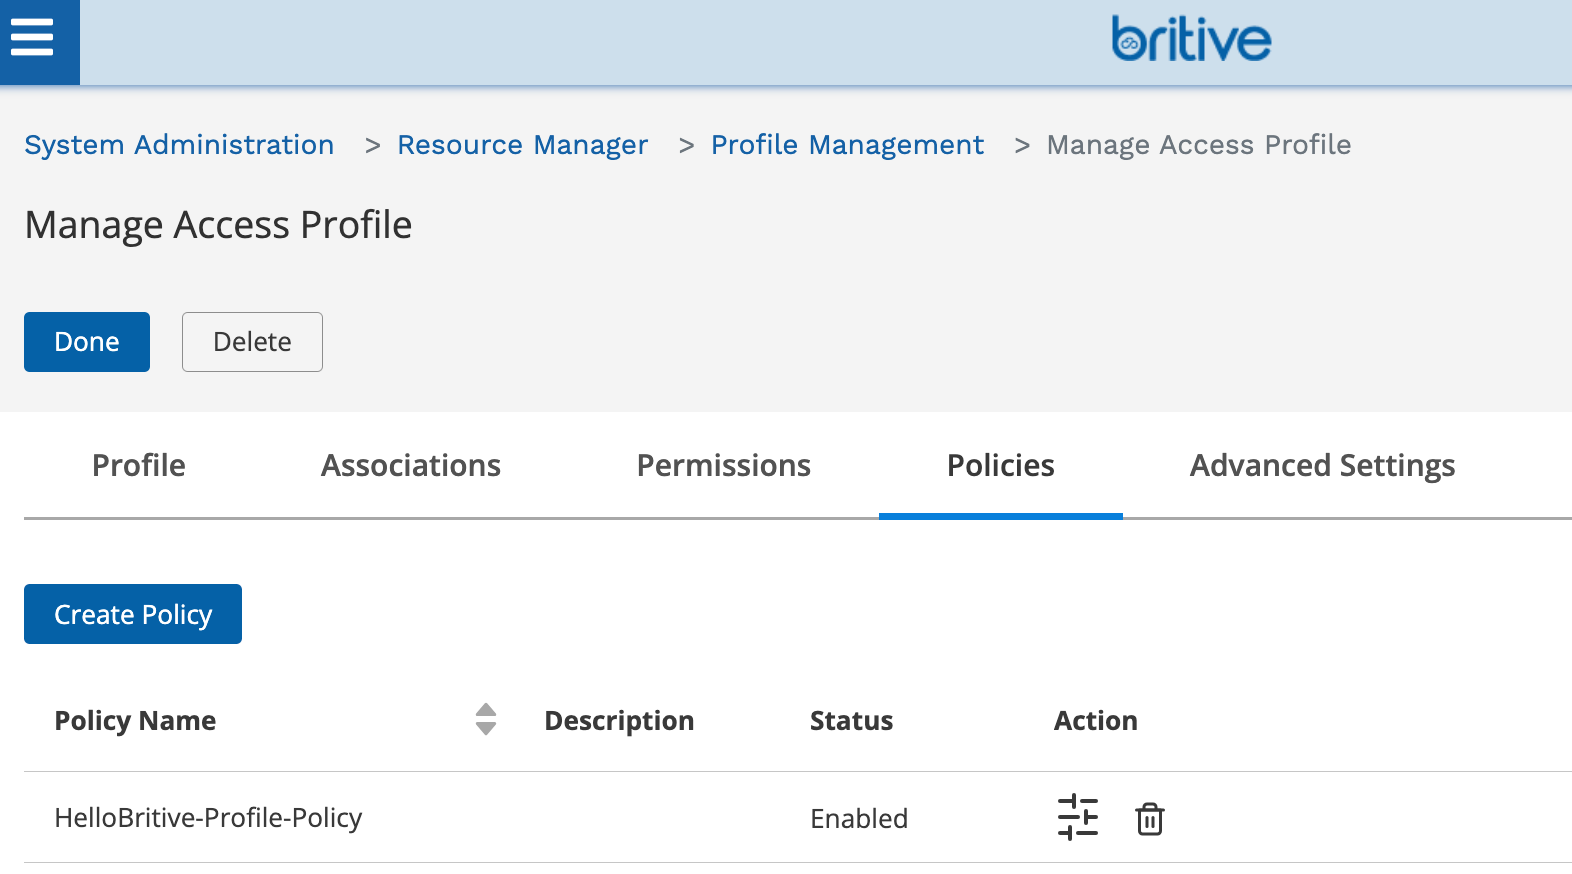
Select all the default options for the Policy and assign a user/member who can execute this.
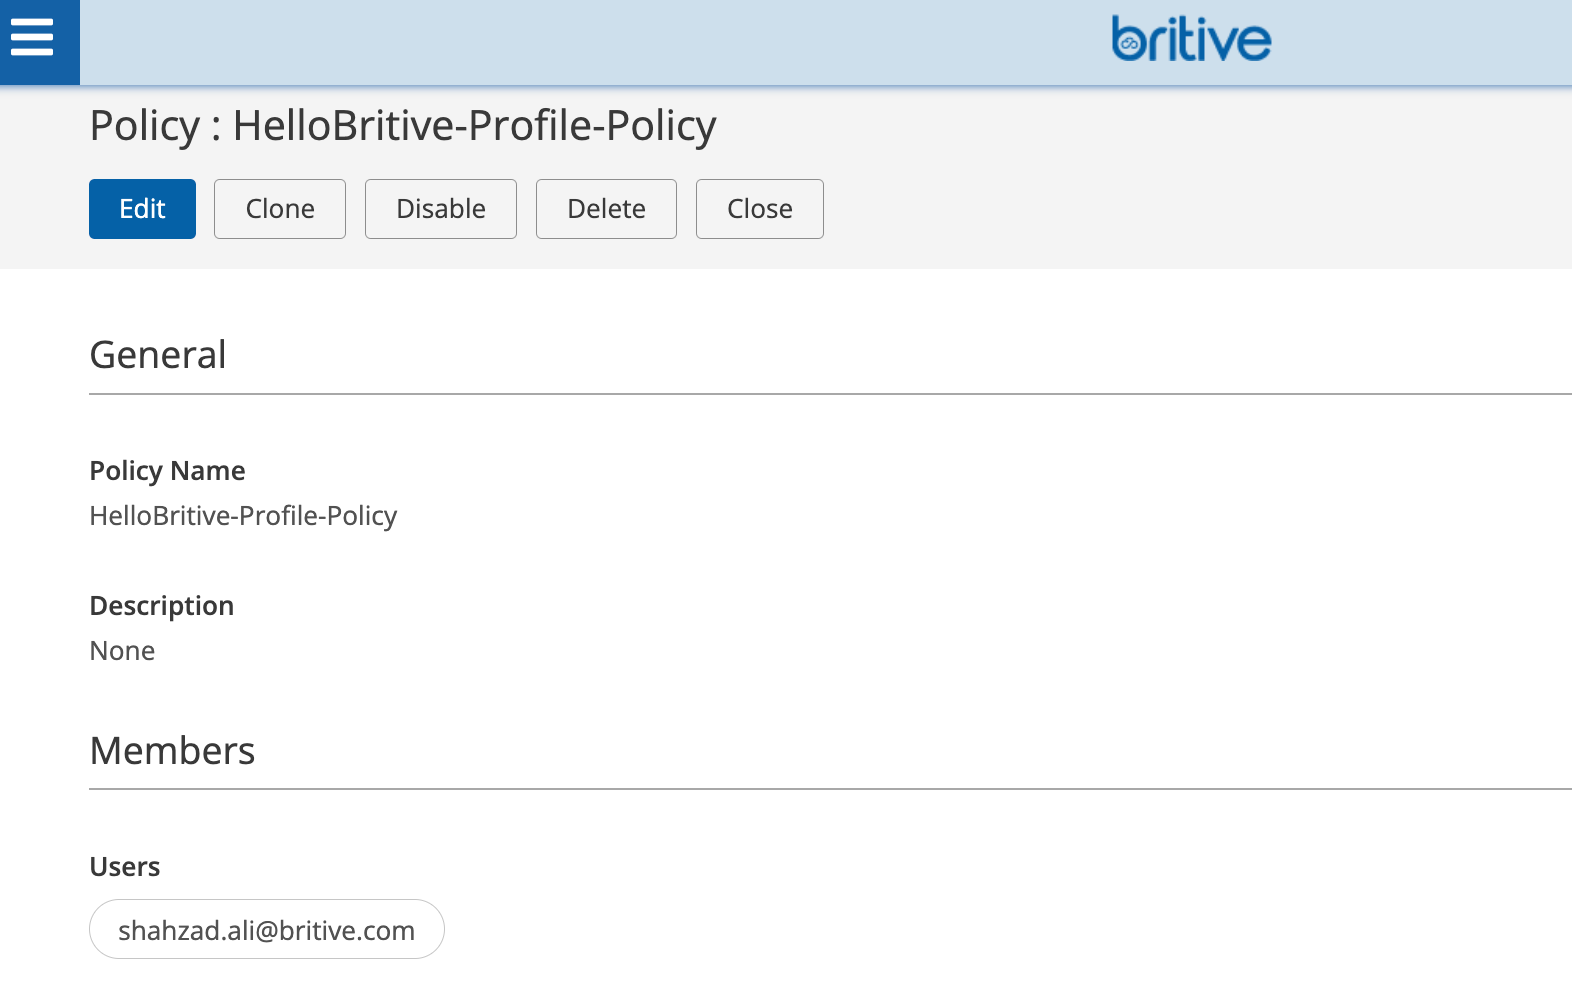
This completes the UI configuration portion.
Access Broker Software Installation and Configuration Steps
Access Broker Installation Pre-Requisite
- Access Broker is a small Jave JRE file that can run on any Windows and Linux OS.
- Britive supports Windows services and Linux OS that supports the systemd services for running broker as a service.
- Broker service installers are provided for Microsoft Windows MSI and Linux OS Debian packages.
- A broker can run on any modern CPU with a RAM requirement of 100MB.
- Make sure that Java Virtual Machine (JVM)/Java Development Kit (JDK) is installed on the OS
- Run the following commands to verify Java installation
$ java -versionjava version "23.0.1" 2024-10-15Java(TM) SE Runtime Environment (build 23.0.1+11-39)Java HotSpot(TM) 64-Bit Server VM (build 23.0.1+11-39, mixed mode, sharing)
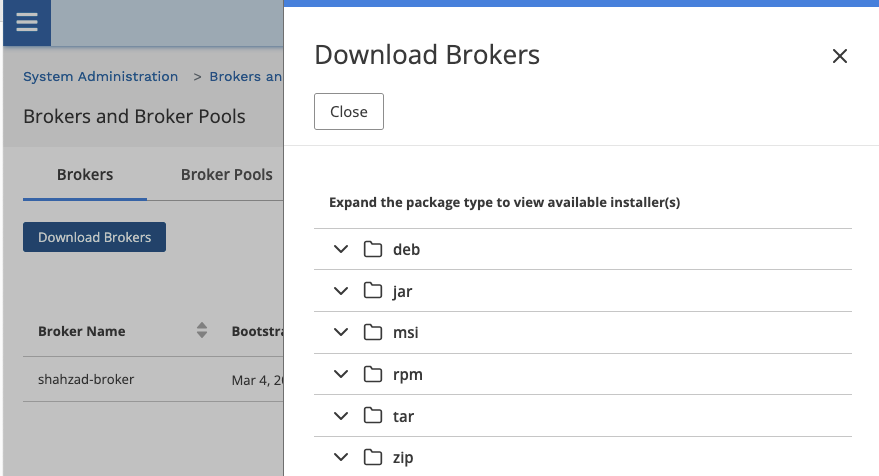
Access Broker Download
The Access Broker software package is available to download from the Britive UI. Click on the “Download Broker”.

Here you can find installation for different systems and environment.
Access Broker Installation
Outbound Firewall or Security Group Pre-Requisite
Outbound or Egress connection are blocked by-default in almost all org these days. Britive Access Broker only needs outbound TCP/HTTPS/443 connection back to Britive SaaS. Allow outbound or Egress connection to in your firewall or security group for https://*.britive-app.com. This would allow Access Broker to establish connection back to your tenant.
You can also further restrict the egress to your specific tenant. For instance if your Britive tenant FQDN is https://netJoints.britive-app.com, you should create
- One outbound rule in your firewall or security group to allow netJoints.britive-app.com on TCP port 443 and
- Second outbound rule for https://remote.mt1-uw2.ea2.aws.britive-app.com service
The second rule is for the MQTT/IoT Core endpoint that the broker will connect to. It first connects to netJoints.britive-app.com/api/broker/bootstrap to get all the data it will need to bootstrap and connect to MQTT.
Installation of Bits
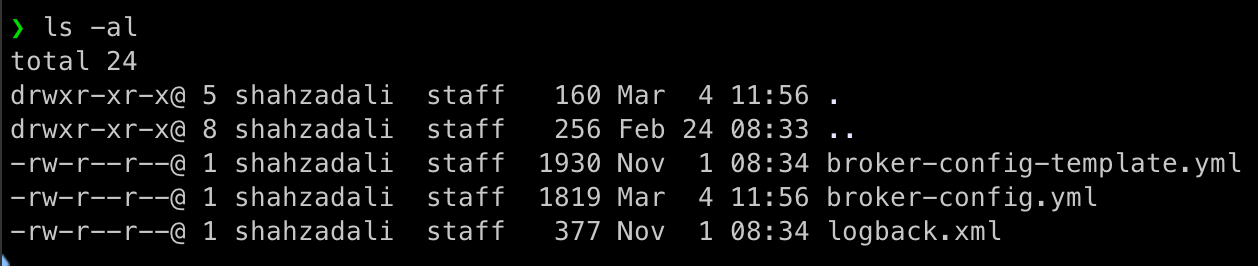
The installation steps will vary based on the OS and Linux flavor. Please refer to this doc Brokers for details. In this guide, we have installed the broker using the zip file and unzipping the files. Once the files are unzipped the output should look like following
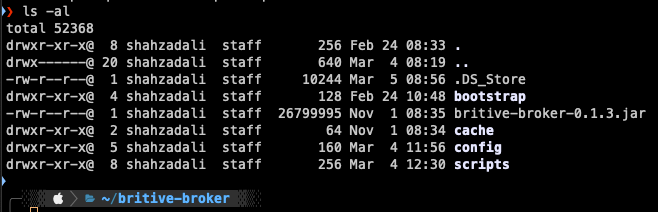
Notice following folders
- bootstrap (to keep files such as broker-name-generator.sh. This script is optional)
- cache
- config (broker yml config file. broker get the configuration, script name etc. from this file to execute)
- scripts (scripts to control and manage checkout and checkin permissions)
Access Broker Configuration
Broker Name Generator Script
This script is optional but as a best practice it is recommended. The broker name will be picked up from the output of this script. The name can be dynamiclly generated but as a best practice recommendation is to use static name for documentation and reference purposes.
#!/bin/bash echo "shahzad-broker"Access Broker YAML Configuration File
There is broker-config.yml template file provided as part of the installation. Rename and keep that file in the folder. Now create a new file with the same name and copy paste the following in the broker-config.yml.
Note that since it is in yml format, the spaces and indention to matter.
config:
  bootstrap:
     tenant_subdomain: catapult.dev2.aws
     authentication_token: jSn3tJ01nts00c0Msh@hzad@li=
     broker_name_generator: broker-name-generator.sh

resource_types:
  HelloBritive-Resource-Type:
    HelloBritive-Permission:
      max_supported_version: local
      checkout_script: /Users/shahzadali/britive-broker-scripts/checkout_hello_britive_script.sh
      checkin_script: /Users/shahzadali/britive-broker-scripts/checkin_hello_britive_script.sh
Notice that my tenant FQDN is https://catapult.dev2.aws.britive-app.com. Make sure to only use the subdomain portion and not the full FQDN. The authentication token should be copied from UI. The token allows access broker jar file to communicate and authenticate to your tenant in the cloud.
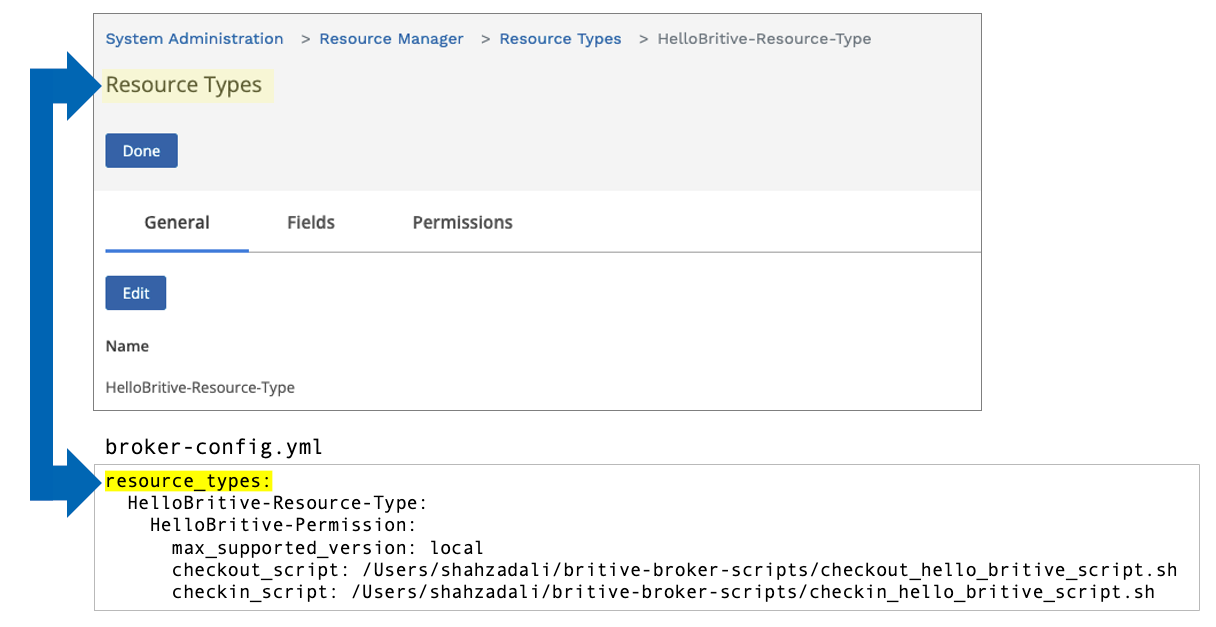
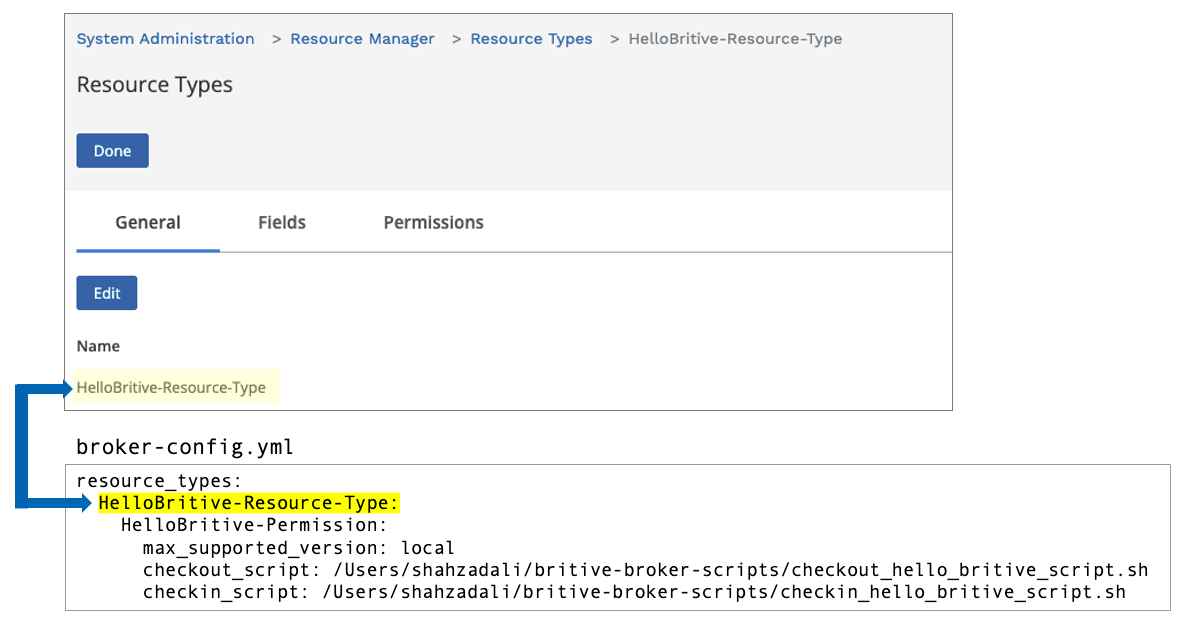
Access Broker UI to YAML File Mapping
The mapping of fields from UI to YAML config file is key to the successful execution of scripts. We will start from configuring the UI portion first. Following diagrams will help you configure the YAML file properly in the later part of the document.

Test Checkout and Checkin Scripts
These test scripts must be copied in the folder of your choice. Make sure to provide the full path with execution rights.
checkout_hello_britive_script.sh
#!/bin/bashecho "Hello Britive World. JIT permission checkout completed successfully"
checkin_hello_britive_script.sh
#!/bin/bashecho "Hello Britive World. JIT permission checkin completed successfully"
Start Access Broker Software
Before you checkout the profile from Britive UI, make sure your Britive Access Broker is up and running and showing following screen. I have deployed Access Broker on my MacBook on Apple Silicon M4. Execute the following command on CLI
$ java -jar britive-broker-0.1.3.jar

OR you can send the output to a log file

$ java -jar britive-broker-0.1.3.jar > britive-access-broker.log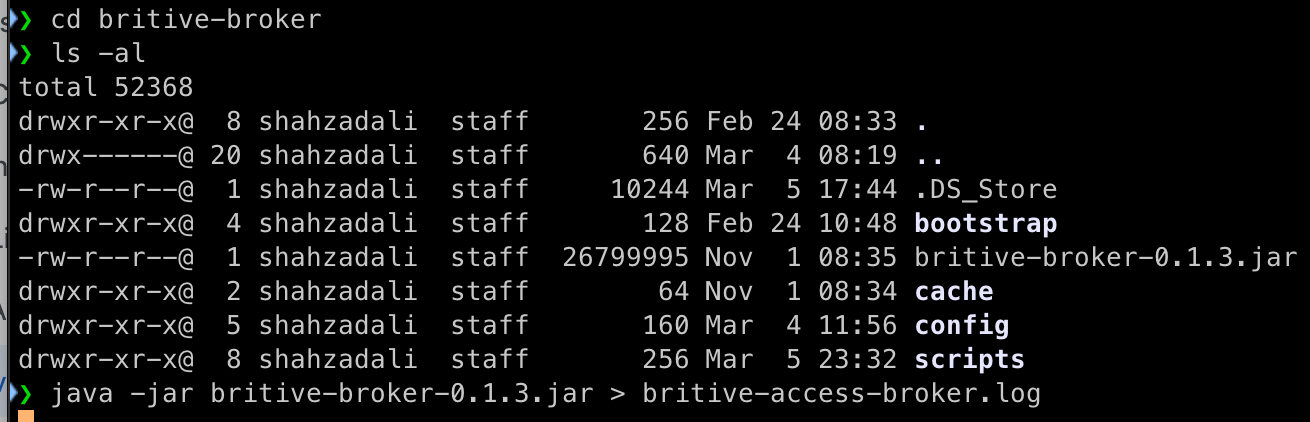
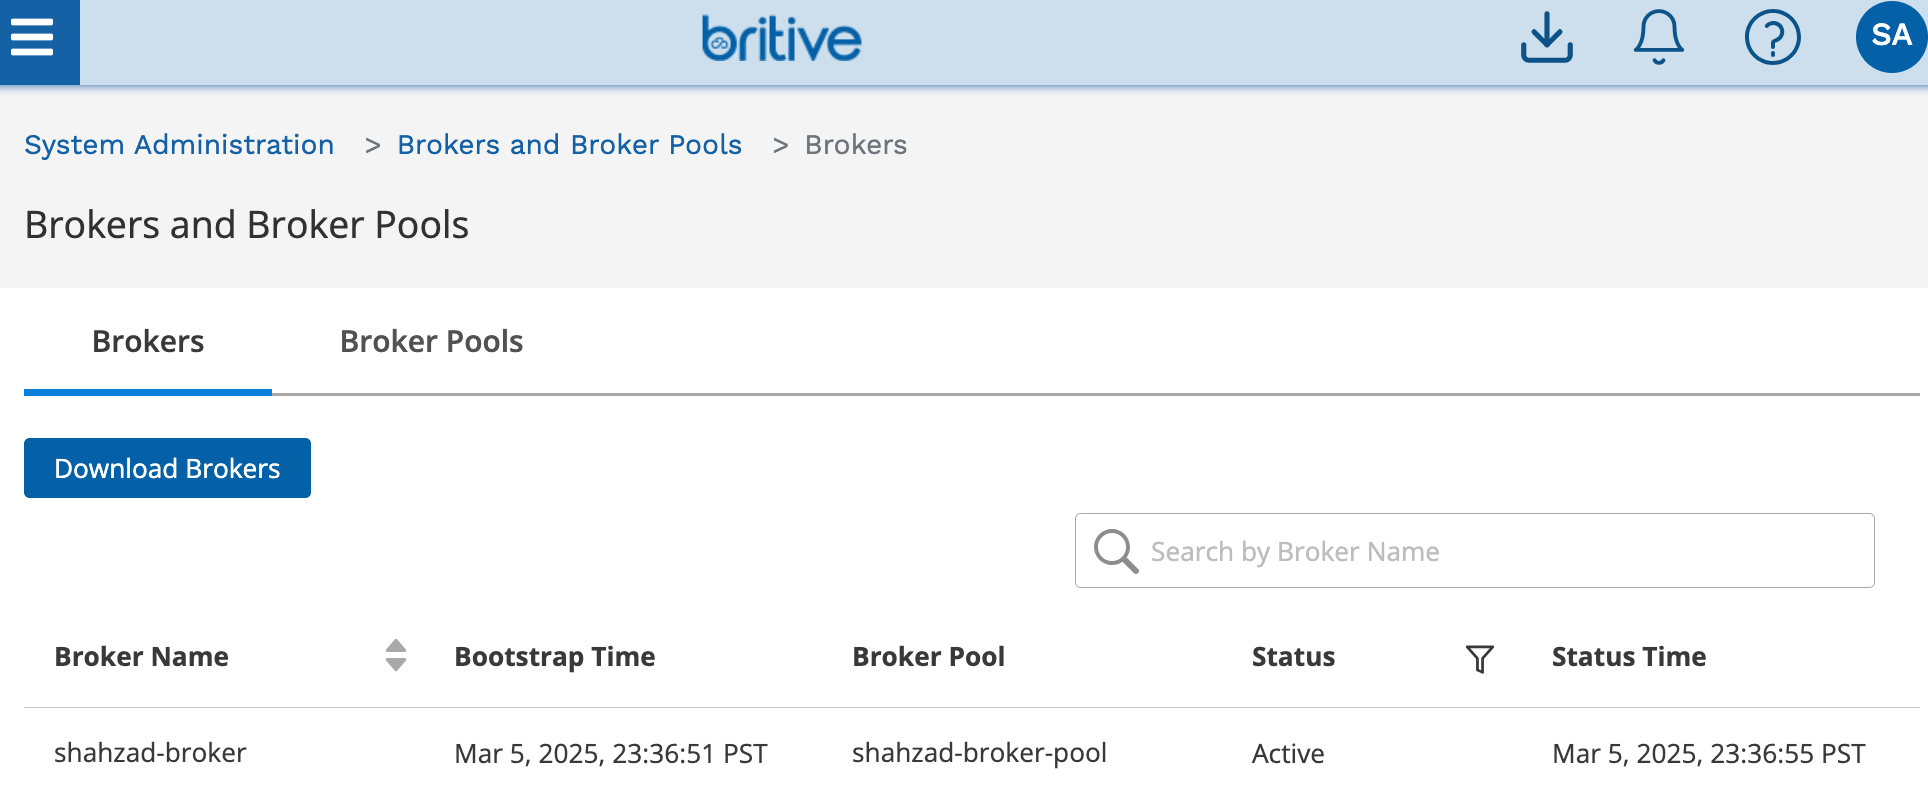
The log output show a successful connection.
❯ tail -f britive-access-broker.log
2025-03-05 23:36:46.102 [Thread-0] INFO  c.b.broker.service.BrokerStartup -- Starting Britive server access broker....
2025-03-05 23:36:46.104 [Thread-0] INFO  c.b.b.service.BrokerBootstrapper -- Retrieving MQTT connection information
2025-03-05 23:36:51.459 [Thread-0] INFO  c.b.b.service.BrokerBootstrapper -- MQTT connection information : MqttConnectionInfo(mqttEndpoint=remote.mt1-uw2.dev2.aws.britive-app.com, mqttCredentials=MqttCredentials(username=agent:mt1-uw2-dev2:catapult:30bb2a9f35724b7a8e9c86d20b3e9c55), authTokenKeyName=qZZ1BBYsEWku, requestTopic=agent:mt1-uw2-dev2:catapult:30bb2a9f35724b7a8e9c86d20b3e9c55, respondTopic=$aws/rules/mt1_uw2_dev2_iot_rule_iotAgentMsg/agent:mt1-uw2-dev2:catapult:30bb2a9f35724b7a8e9c86d20b3e9c55, clientId=agent:mt1-uw2-dev2:catapult:30bb2a9f35724b7a8e9c86d20b3e9c55, mqttKeepAliveSeconds=60, mqttDisconnectSeconds=86400, mqttPingTimeoutMillis=5000, mqttSubscribeTimeoutSeconds=10, clientRotateOverlapSeconds=30, maxCredentialSizeKB=20)
2025-03-05 23:36:51.791 [AwsEventLoop 7] INFO  c.b.b.service.BrokerLifecycleEvents -- Attempting to connect...
2025-03-05 23:36:54.066 [AwsEventLoop 7] INFO  c.b.b.service.BrokerLifecycleEvents -- Connection success! sessionPresent: false
2025-03-05 23:36:54.143 [Thread-0] INFO  c.b.b.service.BrokerBootstrapper -- Subscribed to topic: agent:mt1-uw2-dev2:catapult:30bb2a9f35724b7a8e9c86d20b3e9c55
The UI will also show active broker now.
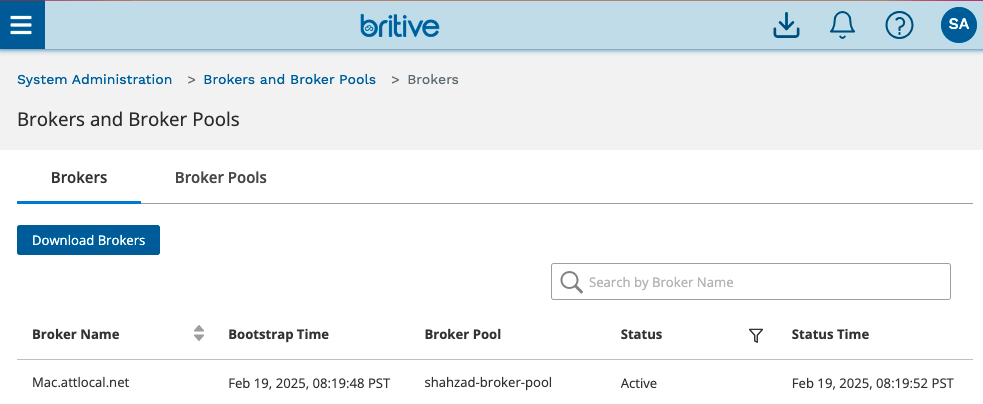
Note: Broker Name Generator Script is Optional
As we discussed earlier, the Broker Name Generator Script is optional. If you don’t use the name generator script, the Britive Access Broker will pickup the local hostname as the broker name as shown from the following screenshots. These screen shots are for information purposes only. For this getting started guide, we are using the name generator script as we discussed earlier.

Checkout and Checkin Testing
Checkout


Check-in
Checkin wont show any output on the screen. If you don’t get any error on the UI, then it means it is working fine.
Conclusion
In this example I demonstrated a simple “Hello to Britive World” print on the screen as a test. Later I will show how to control and manage access to a routing or firewalling device in next post.
However, Managing enterprise access is increasingly complex, with workloads spread across cloud, SaaS, and on-prem environments. Managing time-bound privilege access to on-prem environment is a pain and poses serious challenges as these resources often lack API support.
Britive Access Broker extends Just-In-Time PAM to on-prem resources—bringing cloud security and efficiency to your entire IT environment.
Unlike traditional proxy-based solutions that create bottlenecks or agent-based solutions that increase costs and risks, Britive follows a modern cloud-native approach. It brokers privileged access without requiring proxies or agents, simplifying security and management.
Comments are closed